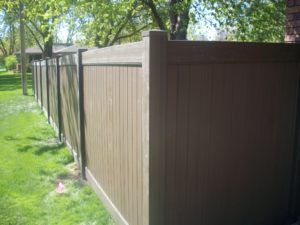
Whether you are a first time fence installer or a seasoned professional; you will find some information here that you need to know. This How To guide takes you through step-by-step to use quick setting grout for fence posts.
What you need to know when using fast setting grout.
- Perfect temperature is 70 degrees.
- Add cold water if warmer and hot water if colder.
- Never use quick-rock in temperatures below 30 degrees.
- If using more than five pounds of grout, mix vigorously with mechanical means such as powered blender.
- Pour grout within five minutes of initial mix.
- Always cap or crown hole to assure water run-off. If salt exposure is possible, grouted area should be sealed with concrete sealer. Fast setting grout is very susceptible to salt and will cause the material to break down.
Below is the Quik-Rock, a popular quick setting grout, mixing guide. If posts larger than 3”, make sure hole is at least 1 ½” – 2” larger than post.
If using fast setting grout as an additive to concrete, use the 1:2:3 mix: Grout : Portland : Gravel. Use as little water as possible but enough to establish flow. Too much water breaks down grout. Your holes should be three times the diameter of the posts. 3” post would require 9” diameter.
To improve your success while using fast setting grout, perform these additional steps:
- Add key ways into the post by cutting slits into the post. This will significantly increase the gripping strength of the grout to the post. This has been the biggest challenge with use is that post will later break free from grout.
- Widen your gap between post to allow materials to flow all around post.
Drilling does not have to continue until you reach the center of the earth. It is ok to not go all the way to the bottom of the slab. According to ASTM F 567 which is the industry standard for setting fence posts in concrete or solid rock:
For a 2 ½” diameter post, you only need to drill to a depth of 7 ½”.
2.5” post diamater x 3 = 7.5” depth
Leave at least a ½” void all around the post so that the grout may flow freely to fill the void. For a 2 ½” post, use a 3 ½” rock drill bit or core drill. TIP: When mixing grout, cut the top of the pop bottle or whatever container you are mixing in at a 45 degree angle. This will allow you to tip the container and still pour the grout in the void.
This is actually 1 ½” deeper than what is required by the Federal Specification RRF-191 which states a depth of 6”. Bear in mind that we are tying into the slab. Doing so, the post will only give/fail if the slab fails. No further footing is necessary.
In accordance with ASTM 567 and standard practice, it is not necessary to keep drilling. Only a few more inches and we will hit the bottom.
Core drilling and rock drilling is not indefinite
It should not only be measured by diameter but also by depth. When installing a project that includes drilling; you must consider the depth of the material that you will be coring or drilling
The below illustration demonstrates standard thickness of paving based on use. This is a good rule of thumb. This does not apply to asphalt. Most asphalt slabs are less than six inches but it may vary considerably as additional lifts are placed over time. It is not unusual to find asphalt slabs over one foot thick.

